Installation Procedures
How to Lay Artificial Grass
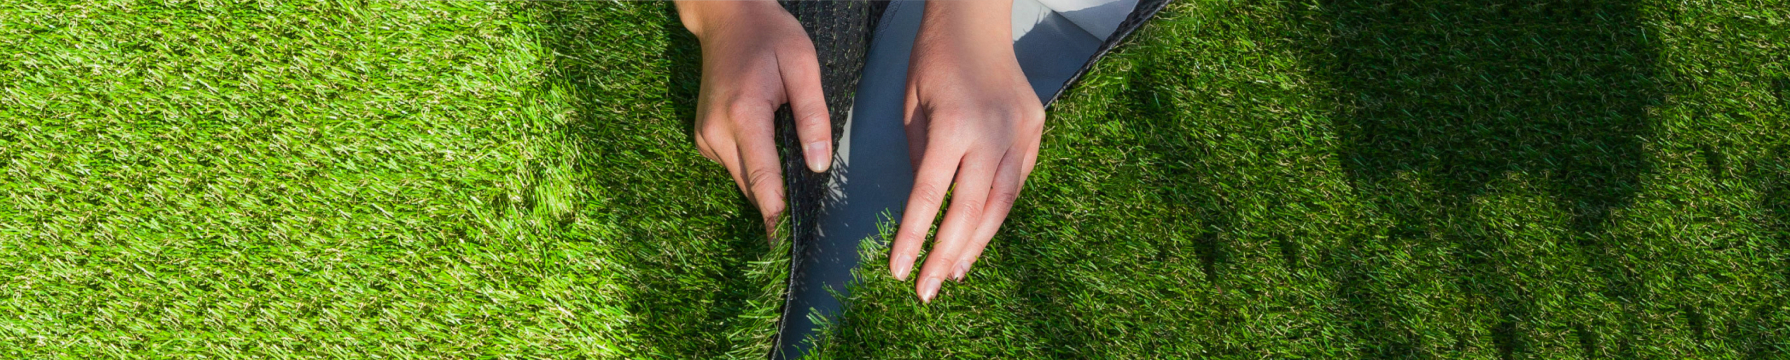
Your DIY installation guide for artificial grass
We recommend a professional artificial lawn installation service but if you prefer to do it yourself, we hope you find these step by step instructions useful. Contact us if you have any questions about how to lay artificial grass.
- Measure the lawn area
- Get tools to lay the artificial grass
- Prepare the ground
- Lay geotextile underlay
- Install the artificial grass
- Glue the seams for each roll of grass
- Apply sand to the artificial lawn
The full installation process should take no more than one day. However, you will need to measure the lawn area (Step 1) in advance so you can buy the necessary amount of turf from your artificial grass supplier. You should also make sure you have all the right tools for the job before you start (Step 2).
Once you have both the tools and the grass on-site, you can begin preparing the ground (Step 3).
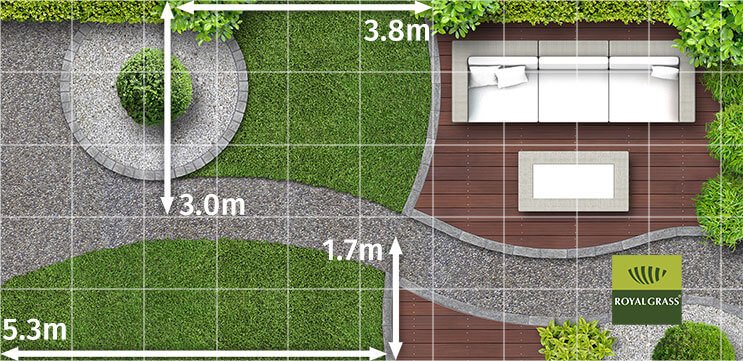
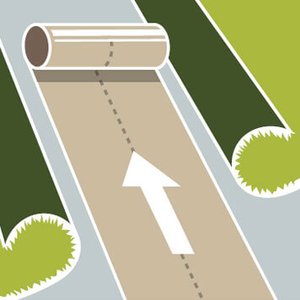
Step 1: Measure the lawn area
To determine how many square metres of artificial grass are required, you need to measure the lawn area. It will help to make an installation plan similar to the one above – notice in the diagram that you should measure to the widest and longest point to ensure the full lawn area is covered. In this example, the first area requires a roll of 3.8m x 3.0m and the second area requires a roll of 5.3m x 1.7m. When ordering the artificial grass, you should add an extra 10 cm to the width and length to allow for loss when cutting.
Artificial grass is supplied in rolls of 4 metre in width and up to 25 metres in length. If the area to turf is less than this, the installation process will be easier because no seams are required – this is the case in our example diagram. For areas wider than 4 metres, you will need to plan where the seam should be placed. For instance, if you have an area of 10m x 6m you could order two rolls of 3m x 10m and the seam would be in the centre as each roll is the same size. This concept of planning the sizes and seams is the same as traditional carpet fitting.
Step 2: Get tools to lay the artificial grass
Before starting the installation, you will need access to the following tools and materials:
* self-adhesive seaming tape is only required if the width of the lawn exceeds 4 metres.
- 20 mm crush rock and capping layer of Cracker dust 5mm and fines
- Perimeter edging board
- Compactor
- Geotextile (stabilizing fabric)
- Self-adhesive seam tape *
- Sharp utility knife
- Measuring tape
- Ground anchors
- A stiff broom or power brush
- Infill sand and sand spreader
Step 3: Prepare the ground
Before laying the artificial grass, you must ensure the ground is stable, even and permeable with a load bearing capacity. This process will provide a suitable subsurface for your artificial lawn:
- Remove the existing grass or plants and dig until about 12 cm deep.
- We do not recommend installing artificial grass on black soil so spread a layer of about 10 cm of crusher dust. For more stability, we advise you to mix the sand with cement at a ratio of 1:5 (cement:sand). Level the subsurface with pavers sand. The height depends on the length of the artificial grass. On average, it should be 2 cm under the border.
- If there is no border yet you can place one all around the area. You can use board or hardwood tiles. This border will make sure the grass stays in place and will prevent you from seeing the backing, for instance when viewed from the terrace.
- Use a compactor tool to compact the sand. Moisten the sand first so it can become more compact.
- Flatten the surface with a wooden bar or ruler.
It is also possible to install artificial grass on concrete, bitumen or asphalt but this subsurface must be even and permeable.

Step 4: Lay geotextile underlay
We recommend you use geotextile instead of root canvas. Although a root canvas may stop weeds, it will not provide the extra stability you need. Also during the installation of your artificial grass, root canvas may creep or ripple. Geotextile is a stabilising fabric that gives extra support and protects the subsurface during the installation. It also completely seals the sand bed so weeds cannot grow through the drain holes of the artificial grass; known as a weed barrier. To install geotextile underlay:
- Unroll the geotextile on the levelled subsurface.
- Make sure it is connected with all edges. The edges are usually the areas where weeds grow.
- Make sure the different strips of geotextile overlap each other by at least 5 cm.
Step 5: Install the artificial grass
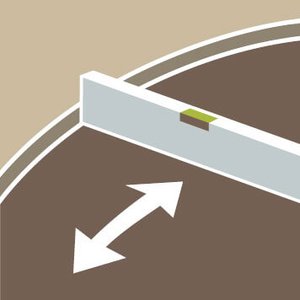
First, you must cut the artificial grass to size with a razor-sharp utility knife. It is recommended to start cutting from the back of the carpet so you don’t cut the grass fibres and you can use the backing stitches as guidelines to get straight cuts. Hold the utility knife at an angle as you cut the synthetic carpet.
If only one piece of artificial turf needs to be installed, follow this procedure:
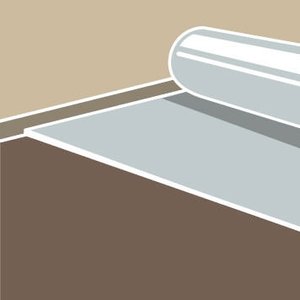
- Unroll the synthetic turf.
- Make sure you keep 10 cm space at all edges for cutting.
- If there is much grass left at the side edges, cut it until you have an overlap of approximately 10 cm. If the overlap is too big, it will be difficult to pull the artificial grass tight.
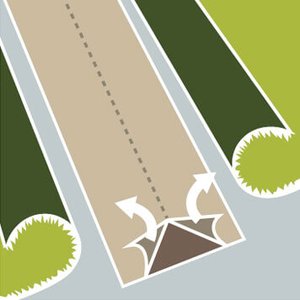
If multiple pieces of artificial grass are to be installed, follow this procedure:
- Unroll the artificial grass. Start with the largest surface.
- The black carpet with the artificial grass fibres will protrude about 5 cm on every side. These protrusions can be removed. Make sure to cut as close as possible to the second row of artificial grass fibres. Rolls are always more than 4 meters in width, so you will still have enough left.
- Fold the edges of two adjacent rolls and cut both rolls along the second row of fibres. Make sure the space between the tufting lines on the seam is the same as the space between the other tufting lines to get a tight seam. This can be realized by cutting both rolls against the tufting line, whilst retaining a piece of the black backing on one of both edges. Always cut from the bottom!
- Make sure the grass is even and there is no tension on the grass. The strips should not overlap.
- To be certain, check the seam at different spots.
When you unroll the the grass carpet, keep in mind that an artificial lawn is best viewed against the grain.


Step 6: Glue the seams for each roll of grass
This only applies when there are several adjacent pieces of artificial grass to be installed.
The seam tape and the carpet backing both need to be dry so do not glue during rainfall. Glue the centre seam before cutting the side edges by following these steps:
- Fold the edges of both rolls approximately 30 cm back.
- Place the Seam Tape with glue or the QuickSeam Tape (QST) in the centre of the two folded rolls of artificial grass. In case of the QST, pull the foil from the tape so the adhesive surface is revealed.
- Fold the rolls back in parts of approx. 20 cm. So firstly, remove 20 cm of the coating of the seam tape, then fold 20 cm of artificial grass and move on to the next 20 cm. Make sure none of the grass fibres of the side of the grass stick to the tape. This will remain visible.
- When you have glued the 2 strips along their full length, firmly press the seams again. For instance, you can put a plank on the seam and then walk over it. Do not open the seam!
- If necessary, you can cut parts overlapping the edging board.
Do not glue any artificial grass to the edging border because the grass needs some space at the sides to shrink or expand. Once you have finished, do not step on the artificial grass for the first 24 hours in order to allow the seams enough time to dry.
Step 7: Apply sand to the artificial lawn
We advise you to spread a thin layer of silica sand on the grass. There are several advantages to this:
- It provides extra weight so the artificial grass will not move.
- It will prolong the lifespan of the artificial grass.
- It protects the subsurface from dents. Dents can be formed when the grass is used intensively or when you have put chairs on the grass.
- It provides extra stability and ensures the grass will not ripple or move.
- It supports the fibres so they will stand upright for a longer time. It also means you will not need to brush the grass that often.
- You will not actually see the sand, as it is hidden by the curly fibres. Special sand will be used, that will not stain your clothes and will not become muddy.
How much sand do you need? When should you apply it? And how?
On average you will need 8 to 10 kg of silica sand per m². The exact amount depends on the quality of artificial grass. You will find this information on the packaging of the artificial grass. Wait for at least an hour after gluing the seams before spreading the sand. Only spread the sand when it is dry. Brush the sand into the artificial grass with a stiff broom or power brush. Brush against the grain so the fibres will stand upright.
Whether you need fake grass in Melbourne to suit a specific need, Multigrass has a variety to choose from. You can get artificial grass for balcony, install durable synthetic grass for childcare facilities, or upgrade sports surfaces with artificial sports turf. Additionally, we offer commercial artificial grass options for a variety of commercial spaces. Find out how much artificial grass costs in Melbourne with our high-quality products.